
Coloring crystals can transform ordinary rocks into dazzling treasures for your art projects. Whether you’re using colored pencils, paints, or even dyes, there are several techniques to bring these geometric wonders to life. Many artists struggle with capturing the transparency and light reflections that make crystals so magical.
By focusing on layering colors and creating highlights, you can easily create stunning crystal drawings that appear three-dimensional and realistic. Prismacolor pencils are popular for this task because they blend smoothly and have vibrant colors that can showcase a crystal’s natural shine and facets.
You don’t need expensive materials to get started with crystal coloring. Simple techniques like building up color gradually and understanding where light hits the crystal can make a big difference in your artwork. The process is relaxing and gives you a chance to explore color combinations while creating something beautiful.
Understanding Crystals and Their Properties
Crystals possess unique properties based on their composition, color, and structure. These natural formations each carry their own energy and characteristics that make them special for different purposes.
Types of Crystals
Crystals come in many varieties, each with distinct attributes. Quartz is one of the most common types and includes clear quartz, rose quartz, and amethyst. Clear quartz is known as a master healer and can amplify energy.
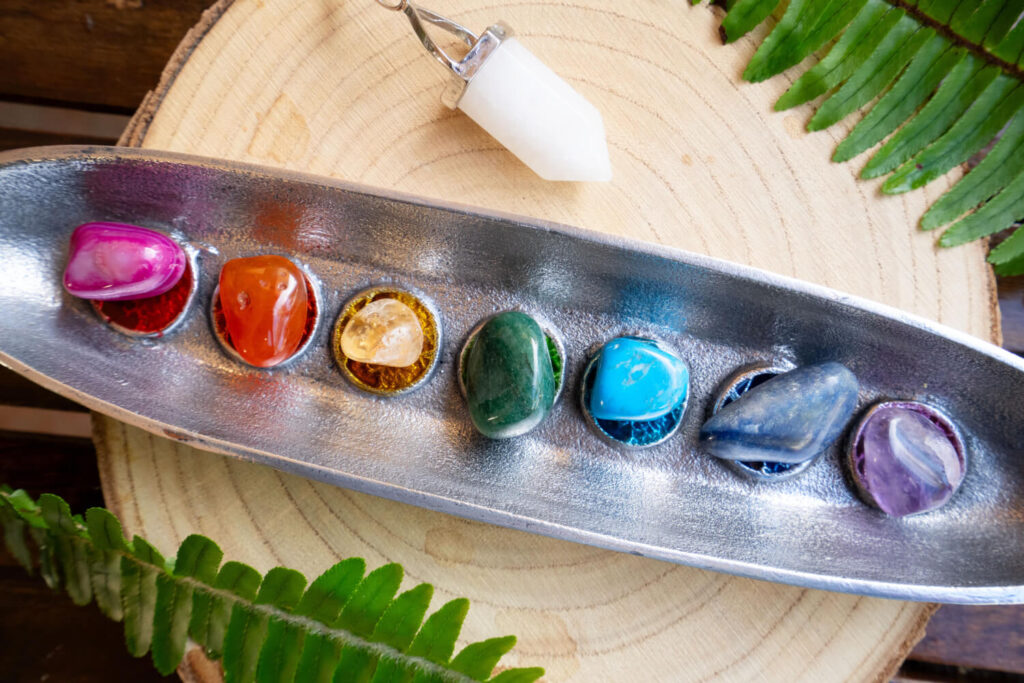
Rose quartz has a gentle pink color associated with love and compassion. Amethyst’s purple hue connects to spiritual awareness.
Other popular crystals include:
- Citrine: Yellow crystal associated with abundance
- Jade: Green stone linked to harmony and balance
- Turquoise: Blue-green crystal known for protection
- Obsidian: Black volcanic glass that grounds energy
Some crystals form in clusters, while others create geometric shapes like cubes, pyramids, or points. Each shape influences how the crystal interacts with energy.
The Importance of Clarity and Sparkle
A crystal’s clarity affects both its appearance and energy. Clearer crystals allow light to pass through more easily, creating that beautiful sparkle you might be drawn to.
Clarity in crystals indicates purity of formation. The fewer inclusions or imperfections, the more direct the energy flow through the crystal.
You can enhance a crystal’s natural sparkle by cleaning it regularly. Gentle washing with mild soap and water works for most stones, though some require special care.
Some collectors value inclusions as they make each crystal unique. These natural “imperfections” can create interesting light patterns or reveal the crystal’s growth history.
The way a crystal catches light can help you determine its quality and authenticity. Genuine crystals often have a depth to their sparkle that imitations lack.
Scientific Information on Crystal Formation
Crystals form through a process called crystallization. This happens when molecules arrange themselves in regular, repeating patterns as liquid rock cools or when minerals precipitate from solution.
Temperature and pressure play crucial roles in crystal formation. Different conditions create various crystal structures and colors. For example, amethyst forms when iron impurities are present in quartz during development.
The basic building block of any crystal is its unit cell—the smallest 3D arrangement of atoms that repeats throughout the entire structure. This arrangement determines the crystal’s shape, hardness, and optical properties.
Crystals grow at different rates depending on environmental conditions. Some form over thousands of years, while others can grow in weeks or months under the right circumstances.
Scientists classify crystals into seven crystal systems based on their atomic structure: cubic, tetragonal, orthorhombic, monoclinic, triclinic, hexagonal, and trigonal. Each system has distinct symmetry patterns and physical properties.
Choosing the Right Tools and Materials
Having the right supplies and color choices makes crystal coloring much easier and more enjoyable. The tools you select will determine your final result, so choose wisely based on your skill level and desired effect.
Essential Art Supplies for Coloring Crystals
Quality colored pencils are perfect for beginners. Brands like Prismacolor offer vibrant colors that blend well for crystal highlights and shadows. A set with at least 24 different colors gives you enough variety for most crystal projects.
Fine-tipped markers work great for precise details and outlines. Look for alcohol-based markers if you want smooth blending.
Don’t forget these basics:
- White gel pen for highlights and sparkles
- Blending tools (stumps or tortillons)
- Quality paper with some texture (at least 80 lb weight)
- Erasable pencil for initial sketching
- Sharpener to maintain precise points
A small ruler helps with geometric crystal shapes. You might also want tracing paper if you’re working from reference images of real crystals.
Selecting Colors and Mediums
Choose colors based on the crystal you’re recreating. Amethysts need purples, while rose quartz uses pink tones. Real crystals have subtle color variations, not flat coloring.
For realistic crystals, include these colors:
- Base color (main crystal color)
- Slightly darker shade for shadows
- Slightly lighter shade for highlights
- White for sparkle points
- Clear blue or gray for transparent areas
Watercolor pencils offer a unique effect for translucent gems. You can activate them with a water brush for a see-through quality that regular colored pencils can’t achieve.
Digital tablets and apps like Color Therapy provide unlimited color options and easy corrections. This medium works well if you prefer flexibility and clean results without supply costs.
Preparing to Color Crystals
Before you dive into coloring your crystals, you need to understand the basics of crystal shapes and how to create that magical sparkle effect. Getting these foundational elements right will make your crystal artwork shine with realism.
Sketching Crystal Shapes
To start drawing crystals, think about their geometric forms. Most crystals have angular shapes with flat surfaces that meet at defined edges.
You can begin with simple shapes like hexagons, rectangles, or triangles. Try drawing a few basic shapes and then connecting them to form more complex crystal structures.
Practice making your lines clean and straight. A ruler can help you create precise edges when you’re first learning.
Remember that crystals grow in different formations. Some cluster together while others stand alone with pointed ends. Look at reference photos of real crystals to understand their natural structures.
Don’t worry about perfection! Slightly uneven shapes can actually make your crystals look more natural and interesting.
How To Draw Sparkling Crystal Outlines
Creating that special sparkle is what makes crystal drawings magical. Start by drawing the outer edges of your crystal with slightly darker lines to define its shape.
Add small triangular shapes inside the crystal to represent facets where light hits. These internal lines should be lighter than your outline.
Draw a few short lines extending outward from corners to create a “sparkle” effect. Keep these lines thin and varying in length.
Leave some white space in your crystal outline to show where light reflects the brightest. These highlights bring your crystal to life.
You can also add tiny dots around the corners of your crystal for extra sparkle. Use a white gel pen on colored paper for a stunning effect.
Remember that light typically hits crystals from one direction, so keep your sparkle effects consistent with your light source.
Step-By-Step Guide to Coloring Crystals
Coloring crystals requires patience and technique. With the right approach, you can create stunning depth and realistic sparkle that brings your crystal drawings to life.
Layering Colors for Depth
Start with a light base color that matches the overall tone of your crystal. Apply it gently using soft, circular motions to create an even foundation.
Next, identify where your light source comes from. Leave the brightest areas with little to no color – these will be your highlights.
Add a medium tone of the same color family around the edges and in areas away from your light source. Use light pressure and build up the color gradually.
For the darkest areas, apply your deepest shade. These typically appear at the edges or in crevices furthest from the light. Remember to blend transitions between colors for a smooth gradient effect.
Pro tip: Use complementary colors to create rich shadows. For example, add a touch of purple to deepen blue crystals.
Enhancing Sparkle and Clarity
To create realistic sparkle, leave small white areas untouched where light would hit the crystal directly. These tiny highlights make crystals appear to shine.
Add a touch of white colored pencil or gel pen to emphasize key highlight points. Don’t overdo this – a few strategic sparkles look more realistic than covering the entire surface.
For clarity, use transparent layers of color. Build up thin layers rather than pressing hard for immediate saturation.
Try using a colorless blender pencil to smooth transitions between colors. This helps create the translucent effect that real crystals have.
Quick trick: Use a sharp eraser to create tiny pinpoints of light after coloring. This works especially well for creating the illusion of internal sparkle and clarity.
Coloring Specific Crystal Types
Different crystal types require unique coloring approaches to capture their natural beauty. Let’s look at how to achieve realistic results for specific crystal varieties using colored pencils or other mediums.
How To Color Quartz Crystals
Quartz crystals often have a transparent or semi-transparent quality that’s tricky to capture. Start with a very light base layer of white or pale blue. This creates the illusion of transparency.
Next, add subtle hints of color where light might refract. Light purples and blues work well for clear quartz. For rose quartz, use soft pinks with white highlights.
Try this layering technique:
- Apply a white or very light base
- Add color in thin layers, focusing on edges
- Create depth with slightly darker tones in crevices
- Add bright white highlights where light would hit
Remember to leave some areas untouched to maintain the crystal’s transparent look. This helps create the illusion of light passing through the crystal.
Adding Realism to Mineral Gems
The key to realistic gem coloring is understanding how light interacts with minerals. Gems have facets that reflect light differently based on their cut and type.
For colored gems like emeralds or sapphires, start with a medium tone of the main color. Then add darker shades of the same color in areas that would be shadowed. The darkest points should be where facets meet.
Create a realistic sparkle by:
- Adding tiny white dots where light would hit directly
- Using complementary colors to create depth (blue with hints of purple)
- Creating gradient transitions between light and dark areas
Pay attention to the natural variations in real gems. Most minerals aren’t a single solid color but have subtle variations and inclusions that add character.
Creative Techniques for Unique Effects
Adding special effects to your crystal coloring can make your artwork truly shine. These techniques will help you create eye-catching sparkle and dimension that brings crystals to life in your coloring projects.
Using Highlights and Shadows
Creating realistic crystals starts with proper highlighting. Try leaving small areas completely white or use a light yellow for a warm glow. These highlights create the sparkle that makes crystals look magical.
For shadows, use darker shades of your base color rather than black. This keeps the crystal looking transparent. Try placing shadows along edges and where facets meet.
You can use colored pencils to build up layers gradually. Start with light pressure and slowly increase it for deeper colors in shadow areas.
A fun technique is adding tiny white dots with a gel pen after coloring. These dots create a glittering effect that makes your crystals pop off the page!
Experimenting with Advanced Mediums
Alcohol markers work wonderfully for crystals because they blend smoothly. Try using two or three similar shades and let them blend while still wet for a seamless look.
Watercolors create beautiful crystal effects too! Paint a light base wash, then add darker colors to corners while the paper is still damp. The colors will blend naturally, creating a realistic crystal appearance.
Metallic pens or paints can add extra sparkle. Try using them for highlighting facet edges or adding tiny sparkles throughout your crystal.
Clear glitter gel pens add dimension when applied over colored areas. They create actual sparkle that catches the light just like real crystals!
Combining techniques often yields the best results. Try colored pencils for detail work after using markers for base colors.
Exploring Crystal Growing and Color Influence
Growing crystals at home is both a fun activity and a fascinating science experiment. The way crystals form and take on color involves interesting chemical processes that you can observe firsthand.
The Relationship Between Crystal Growing and Coloring
When you grow crystals, you’re watching a natural process where dissolved substances come together in an organized pattern. Adding color to your crystals can happen in different ways. Some dyes blend into the crystal structure as it forms, while others don’t fit well.
Not all dyes work the same way with crystals. According to search results, some dyes remain mostly in the solution even if you use a lot. This happens because of how the crystal structure forms at a molecular level.
You can try food coloring for a simple approach. It works well for many home crystal growing projects and is safe to handle.
For a unique effect, try using highlighter ink to create glow-in-the-dark crystals! This creative method involves coloring your seed crystals with highlighter before growing them.
Scientific Perspective on Color in Crystal Growth
The science behind colored crystals involves understanding how molecules arrange themselves. Crystal structures have specific patterns and spaces where color molecules may or may not fit.
Crystal growth happens through a process called nucleation, where molecules organize around a starting point. When you add dye or color, you’re introducing new molecules to this process.
Temperature and evaporation rate affect how well color incorporates into your crystals. Slower growth often allows better color distribution throughout the crystal.
Different crystals accept colors differently based on their molecular structure. Some crystals naturally reject certain dyes because the color molecules are too large to fit in the growing crystal structure.
You can experiment with various factors like solution concentration and temperature to see how they affect the color intensity of your crystals.